The University of Kansas

Inside Spencer: The KSRL Blog

Books on a shelf

Welcome to the Kenneth Spencer Research Library blog! As the special collections and archives library at the University of Kansas, Spencer is home to remarkable and diverse collections of rare and unique items. Explore the blog to learn about the work we do and the materials we collect.

Repairing Zapolote: a Conservation Treatment for a Lithograph by Mary Huntoon
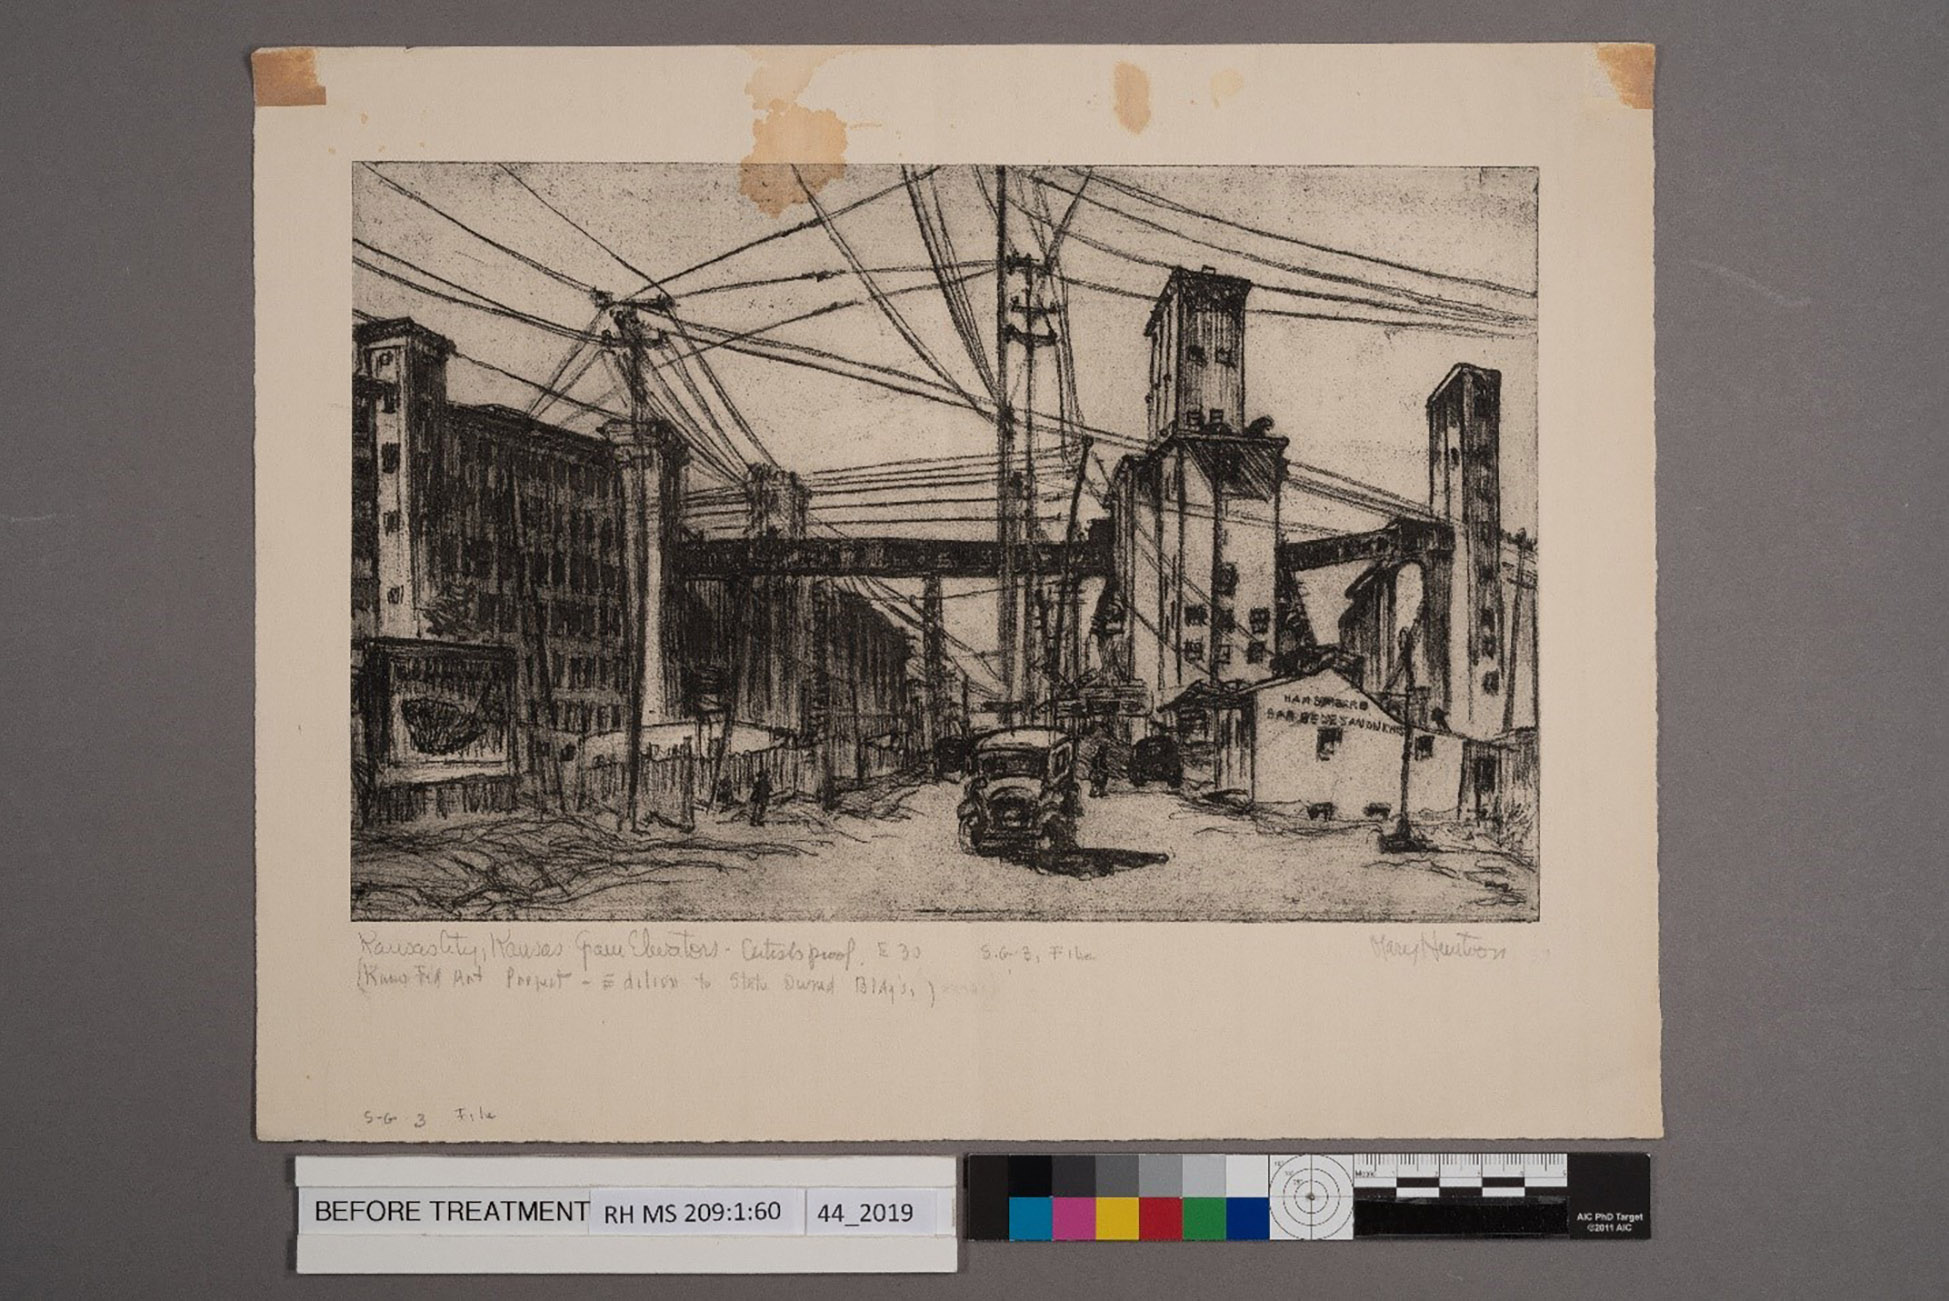
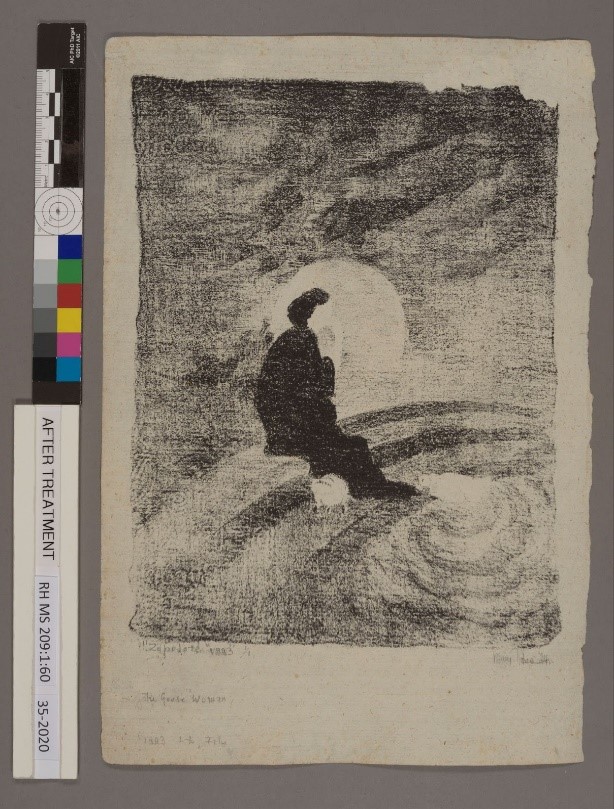
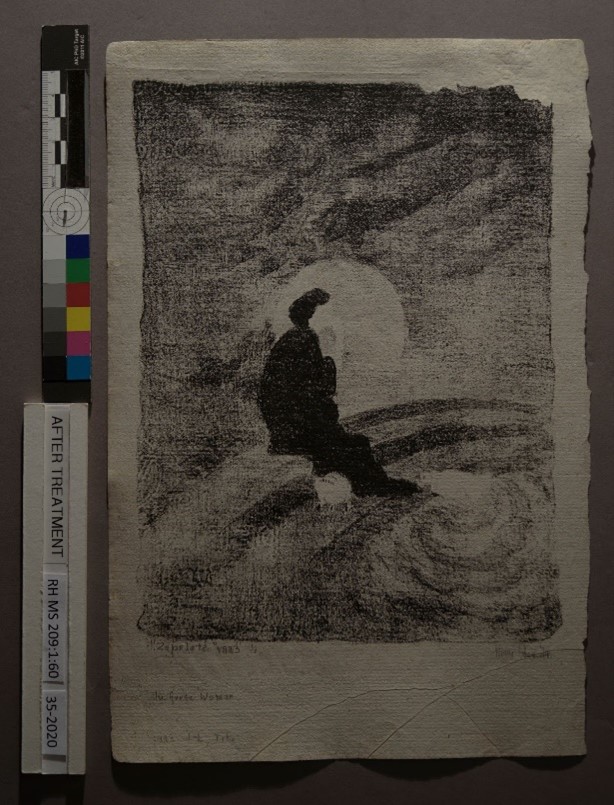
April 14th, 2021

Zapolote, also known as The Goose Woman is one of nine known lithographs by Kansas artist Mary Huntoon. Based on Huntoon’s notations, we know that this single edition print was made in 1923 while she attended the Art Students League in New York, NY. Zapolote is a mysterious image depicting the silhouette of a seated woman contrasted by a bright full moon surrounded by dark clouds. Huntoon used broad, arching lines to hint at the woman’s surroundings, which are generally abstract, and allude to a rippling pool at her feet. 

This work is part of a large collection of prints, drawings, and watercolors by Huntoon at the Kenneth Spencer Research Library. Along with the Huntoon collection at the Helen Foresman Spencer Museum of Art, this collective holding at KU is regionally significant, connecting KU to other regional and national collections (e.g., Alice C. Sabatini Gallery in Topeka, Kansas; Mulvane Art Museum at Washburn University in Topeka, Kansas; and the Philadelphia Museum of Art).

The Mary Huntoon lithograph Zapalote, seen before treatment in normal light.
Image 1: The Mary Huntoon lithograph Zapolote, seen before treatment in normal light. Mary Huntoon Papers, RH MS 209:1:60. Click image to enlarge.
The Mary Huntoon lithograph Zapalote, seen before treatment in raking light.
Image 2: The Mary Huntoon lithograph Zapolote, seen before treatment in raking light. Mary Huntoon Papers, RH MS 209:1:60. Click image to enlarge.

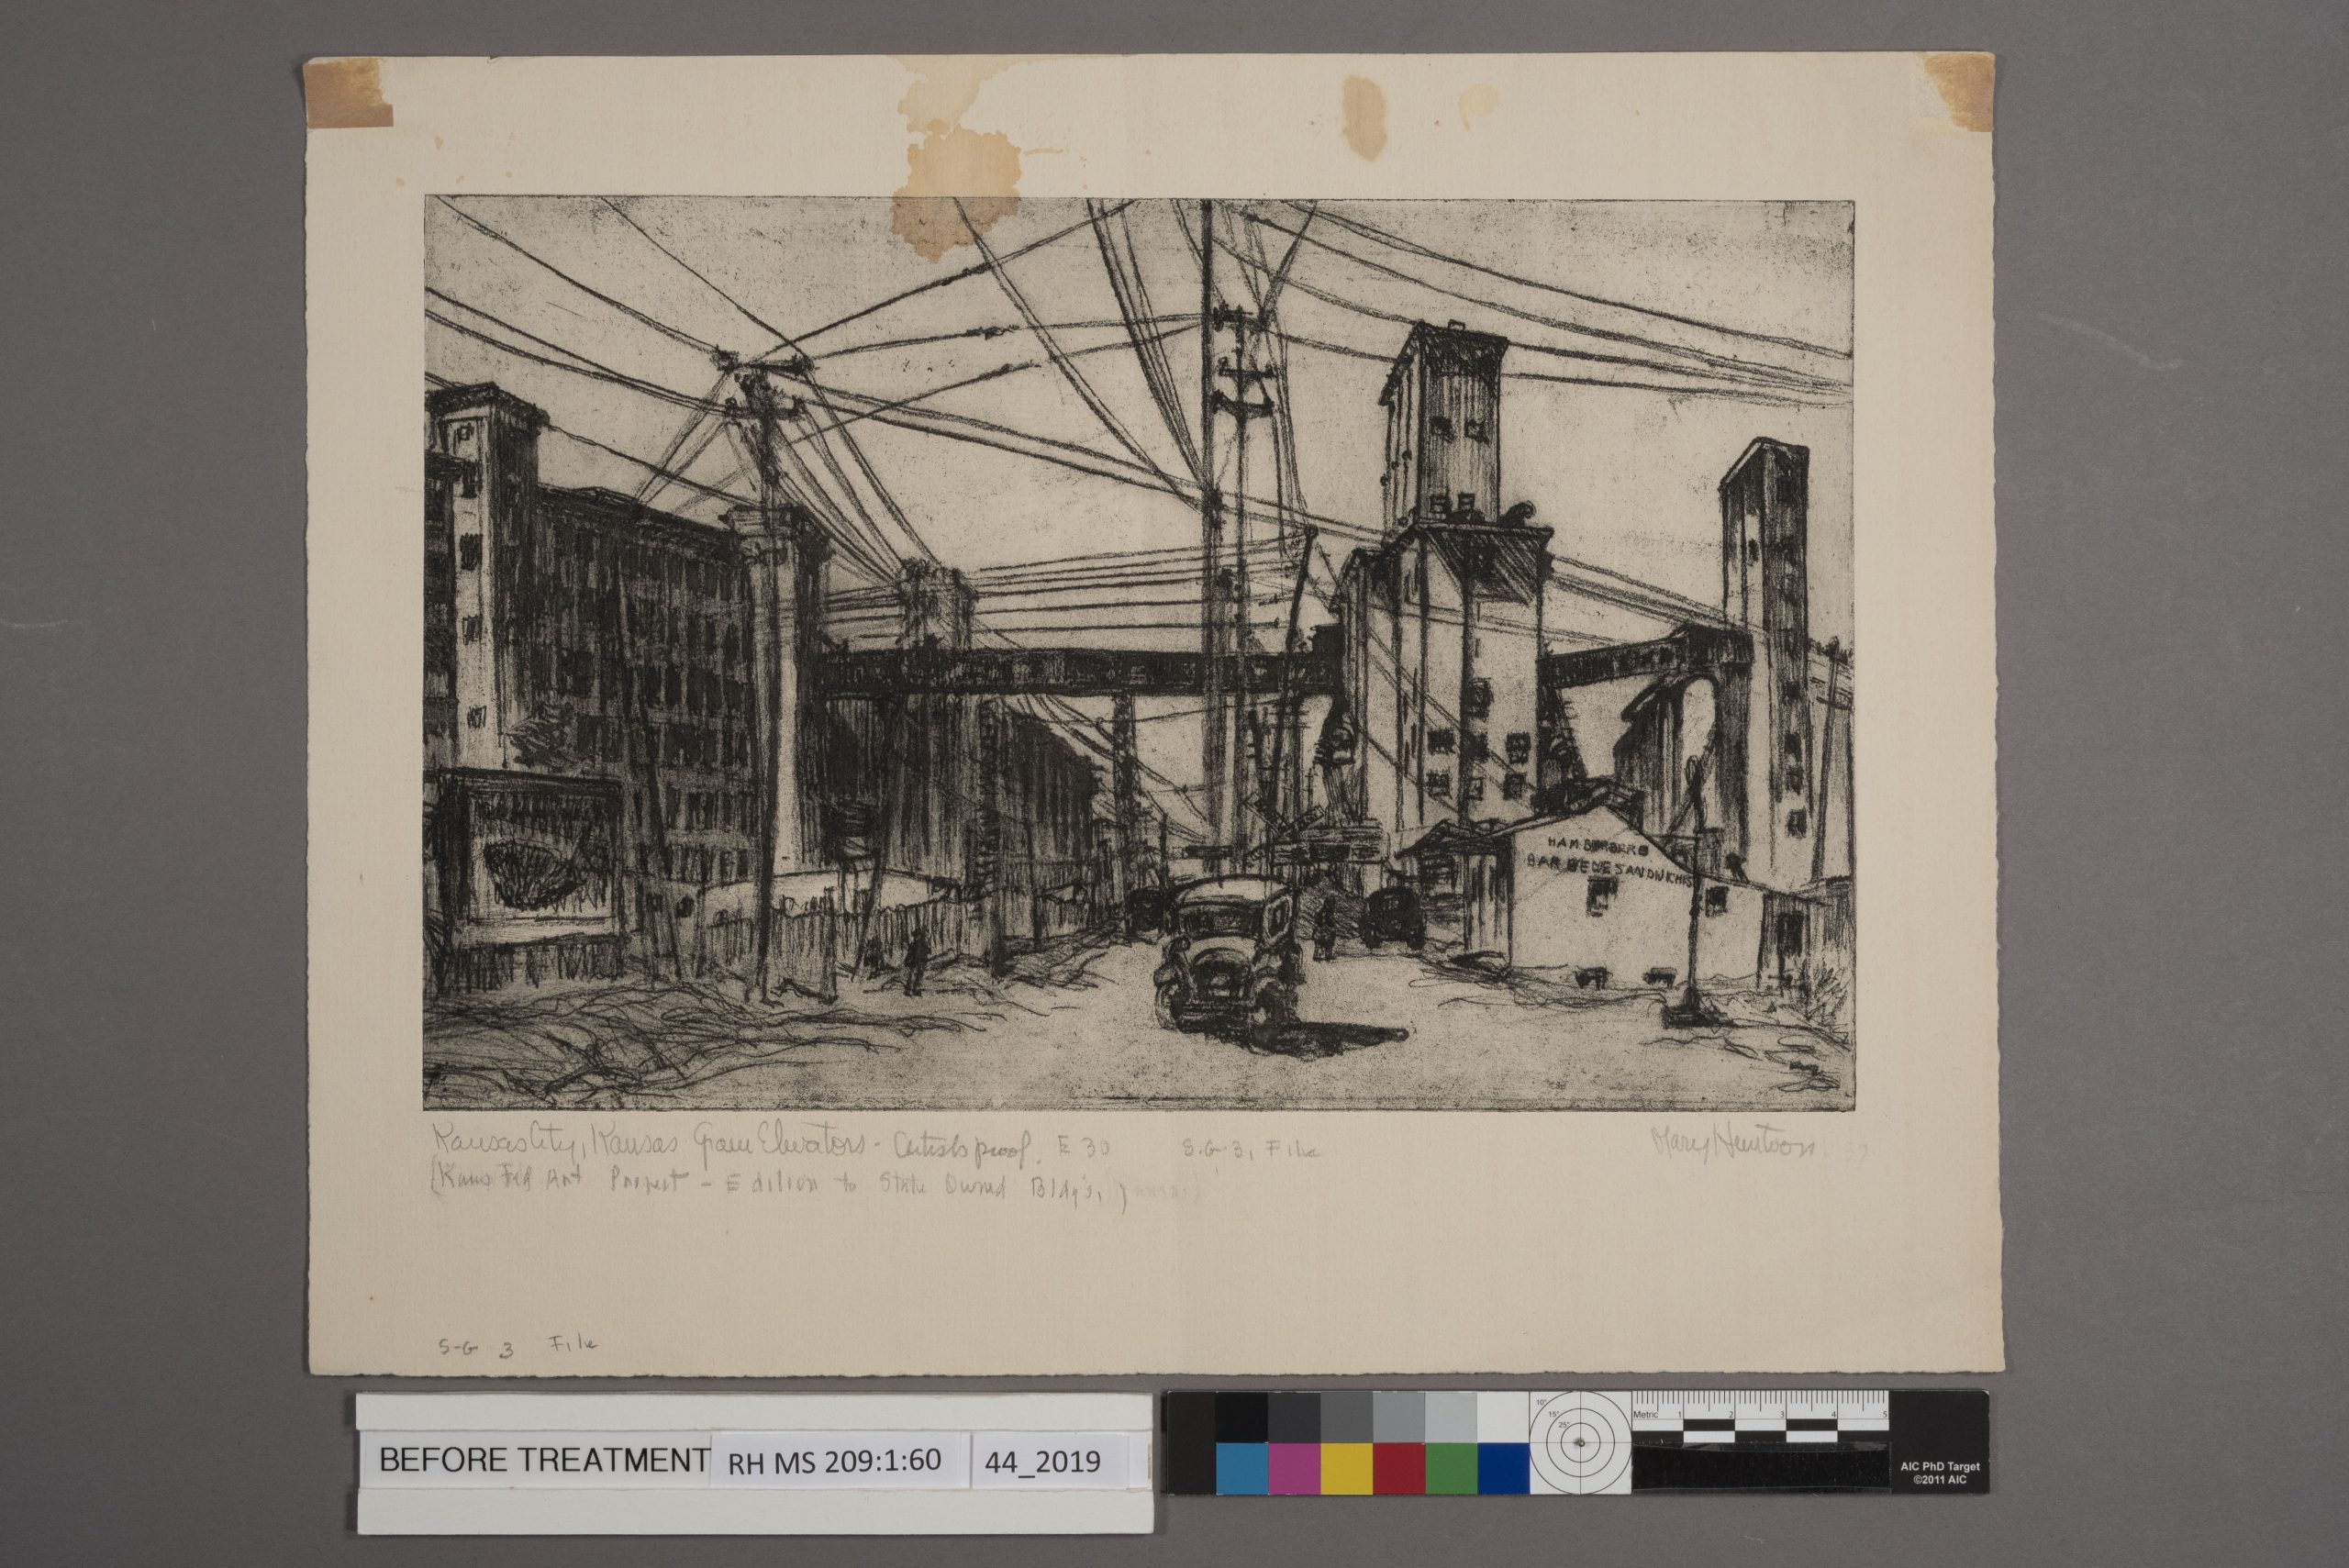
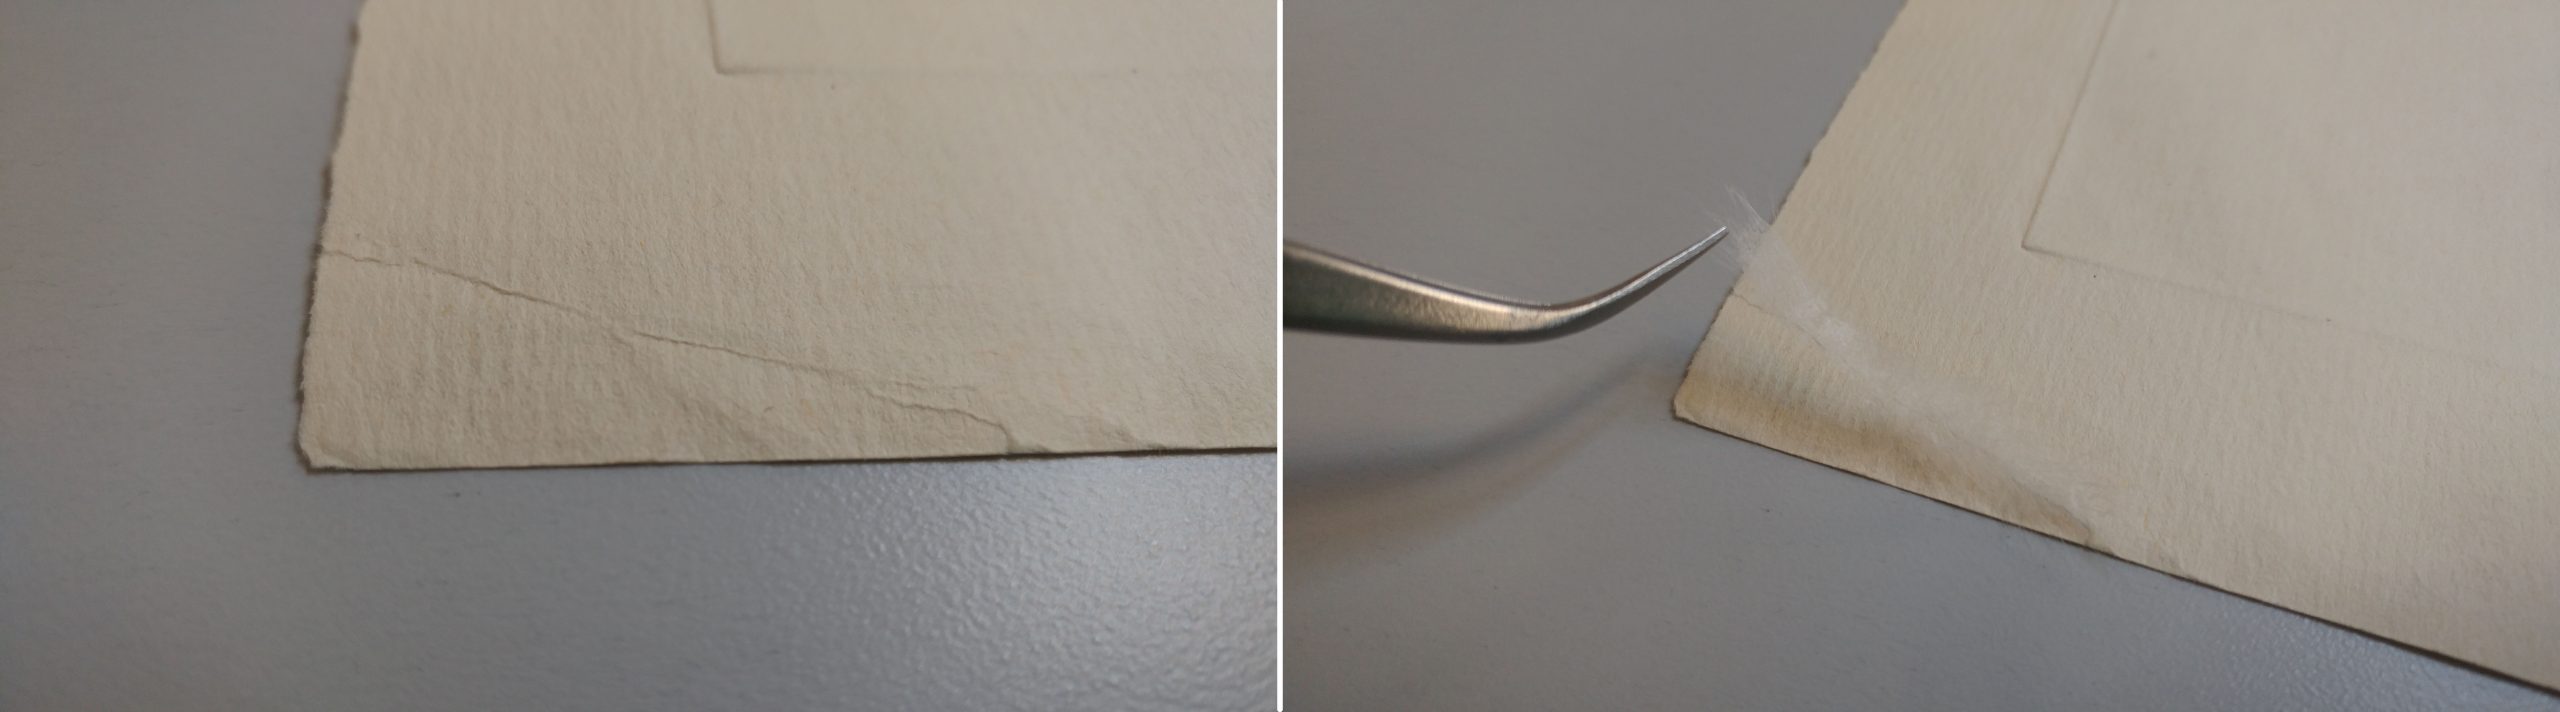
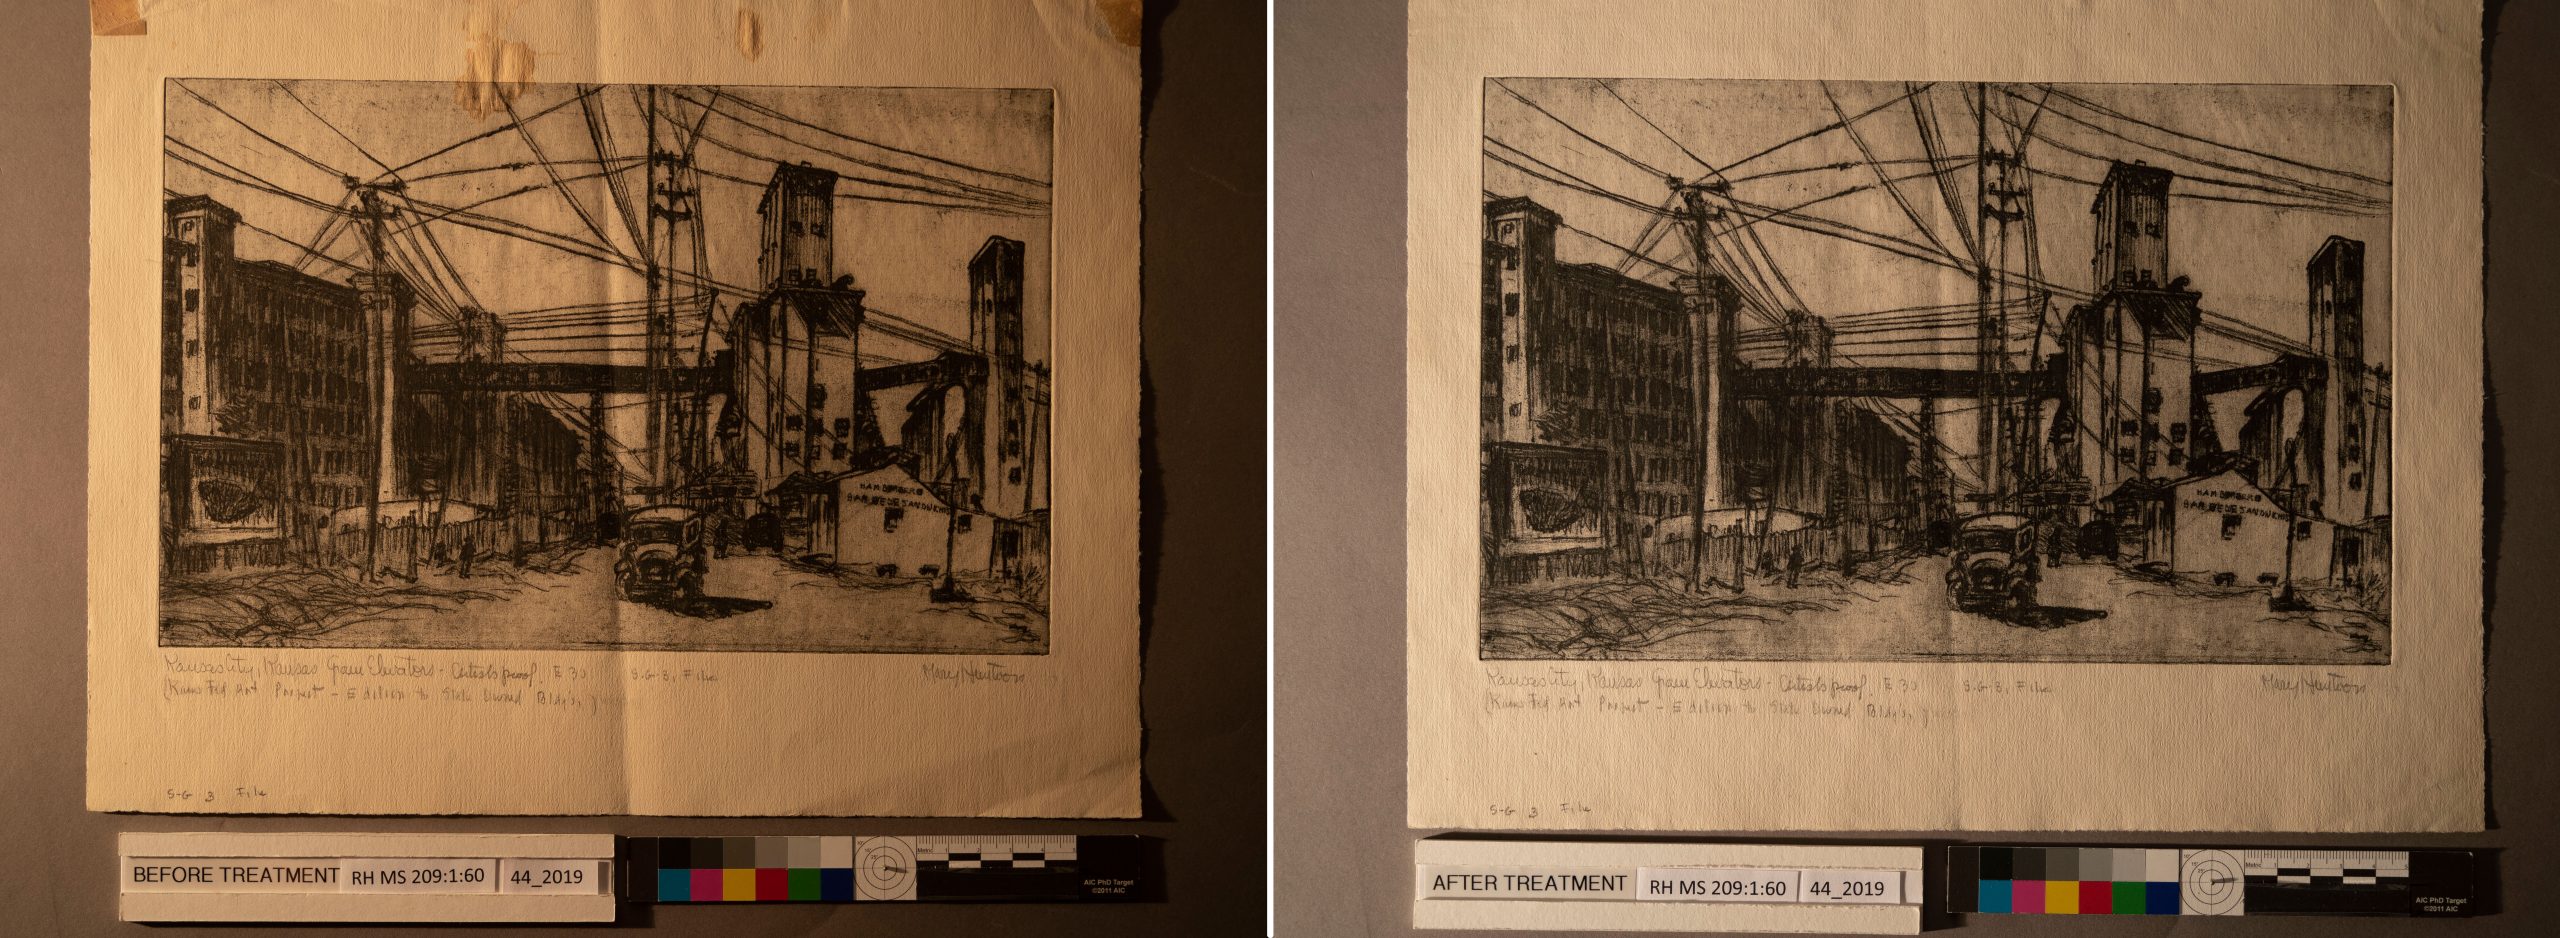
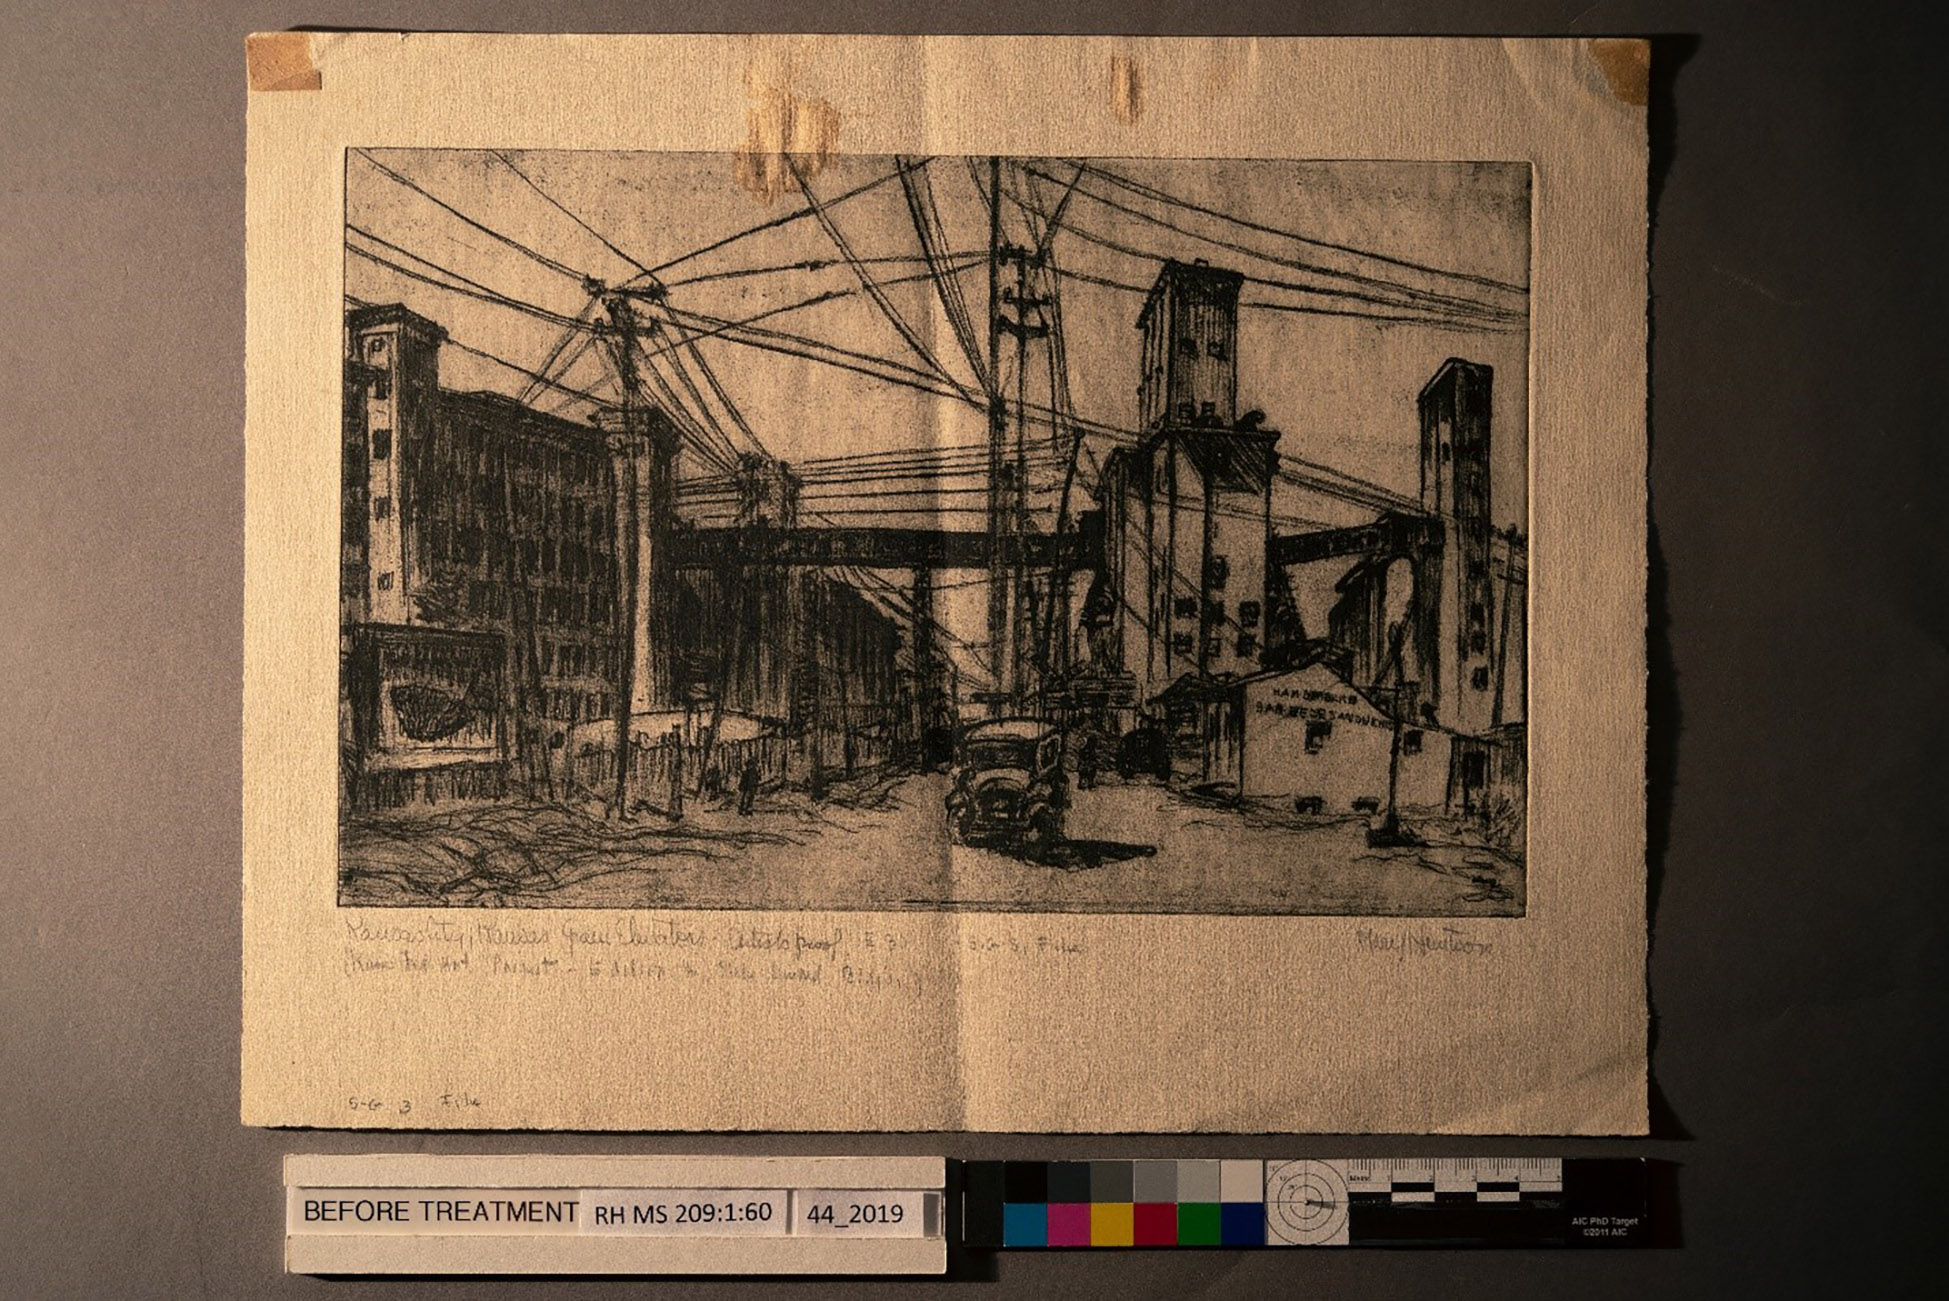
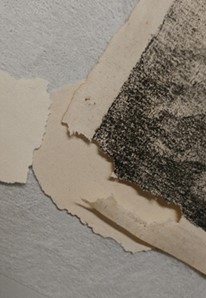
I prioritized this print for conservation treatment during a condition survey of Huntoon’s collection of works because the print had sustained significant pest damage (see images 1-2). The entire upper right corner was lost as well as a few other smaller areas across the top edge. Tiny bite marks were visible along the edges and a long strip of the remaining top edge of the sheet was at risk of tearing off during handling.  

Conservators use several techniques for filling paper that is lost. The most common approach is to attach a new piece of paper with a similar thickness, color, and texture that is cut to fit inside the loss like a puzzle piece. The downside to this approach is that the search (and creation) of such a fill is often time-intensive. Even when the edge of the fill is beveled or butt-joined, a small seam is usually visible. The rough and jagged edges created by the hungry pest along this particular loss further complicated the shaping and stabilization process.

I had an opportunity, however, to use a simpler approach that would help stabilize the jagged edges and save time searching for the perfect fill paper: pulp fills. Pulp fills are a great method for filling paper because unlike the method described above, there is a much smoother transition between the original sheet and the fill. In this technique, wet paper pulp is dropped into the area of loss as a slurry, and can be built up to the same thickness as the print. This type of filling method can only be done if the entire print can be washed in advance because the print needs to be wet during this process. Fortunately, my testing confirmed that this print would be safe to wash.  

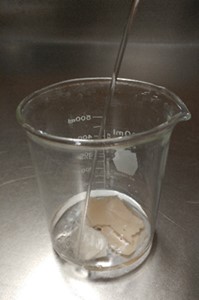
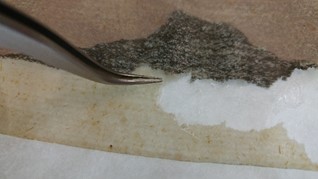
Next, I consulted my small collection of pre-cast paper pulp, all from high quality papers that had been previously washed. I selected two different colored paper pulps to mix together to make the best possible color match (see image 3). Then the pulp was reconstituted into a slurry with water and mixed thoroughly (see image 4).

Finding a selection of paper pulp that best matched the color of the print.
Image 3: Finding a selection of paper pulp that best matched the color of the print. Mary Huntoon Papers, RH MS 209:1:60. Click image to enlarge.
The paper pulp was turned back into a slurry by adding water.
Image 4: The paper pulp was turned back into a slurry by adding water. Mary Huntoon Papers, RH MS 209:1:60. Click image to enlarge.

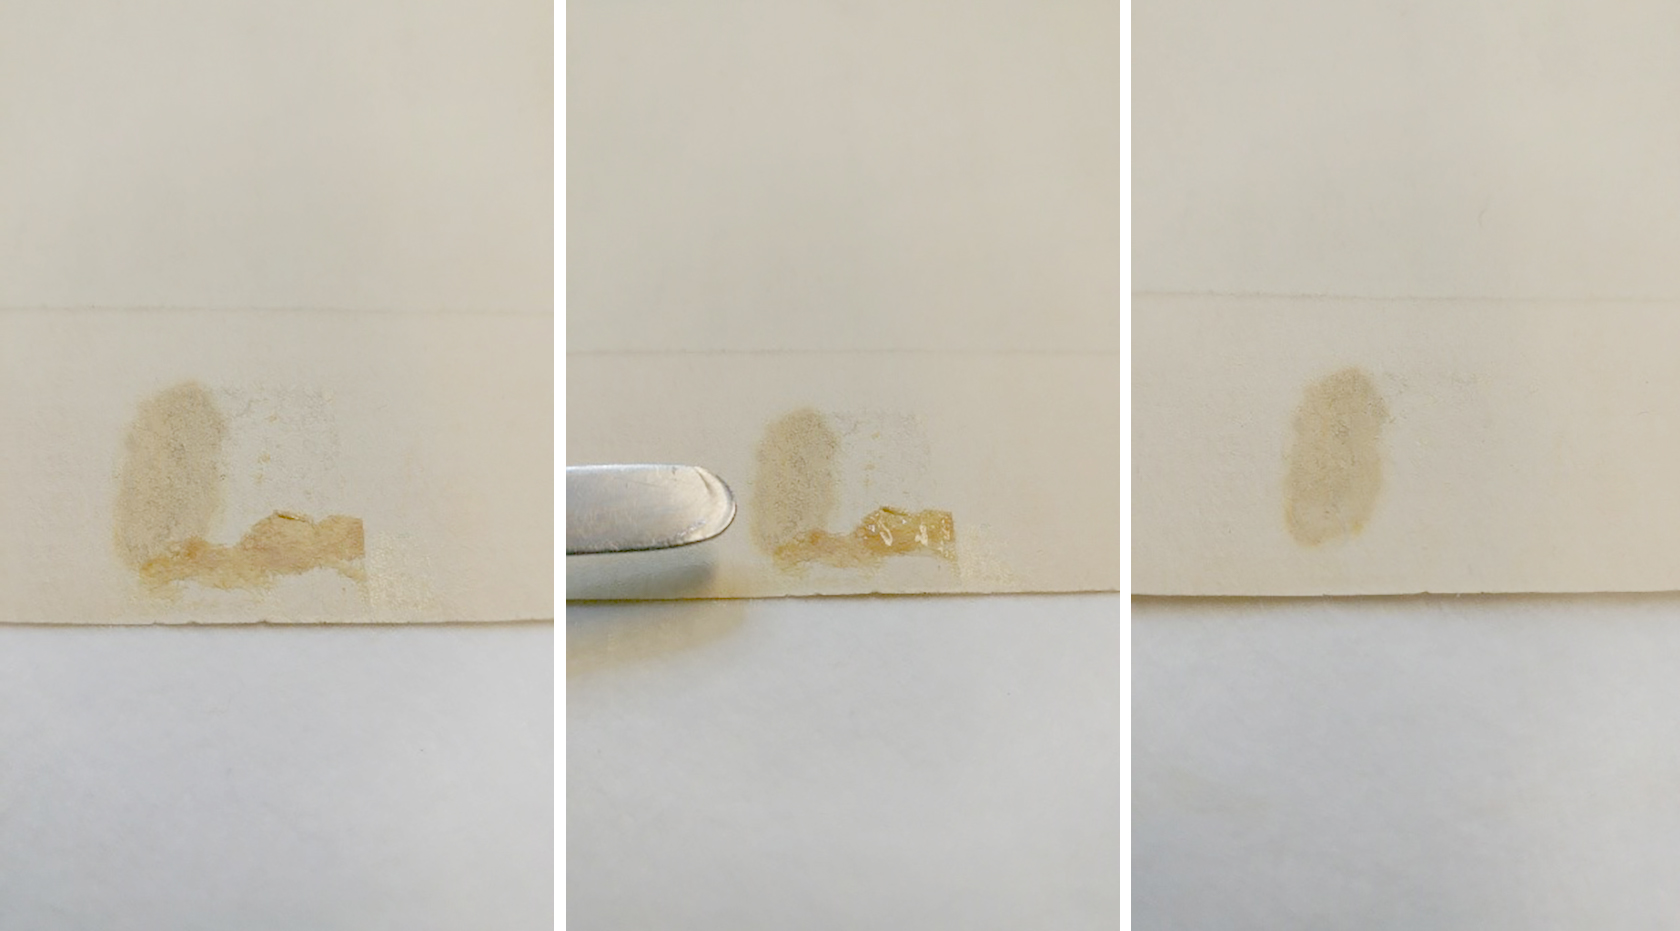
After the pulp was ready, I used a pipette to drop small amounts into the area of loss. This was completed on a light table so I could match the thickness of the pulp with the thickness of the paper. I used a vegetable scrubber and curved tweezers to tamp down and shape the pulp into a smooth mat. A sheet of cotton blotter and clear polyester sheeting was also used to control the amount of water in the pulp slurry and anchor and cast the pulp. In about thirty minutes, I had already filled the entire upper right loss (see images 5a-c).

Curved tweezers helped to manipulate the pulp to match the thickness of the print.
Image 5a: Curved tweezers helped to manipulate the pulp to match the thickness of the print. Mary Huntoon Papers, RH MS 209:1:60. Click image to enlarge.
The progression of filling the loss with wet paper pulp.
Image 5b: The progression of filling the loss with wet paper pulp. Mary Huntoon Papers, RH MS 209:1:60. Click image to enlarge.
Cotton blotter was used to absorb excess water and help anchor and cast the pulp.
Image 5c: Cotton blotter was used to absorb excess water and help anchor and cast the pulp. Mary Huntoon Papers, RH MS 209:1:60. Click image to enlarge.

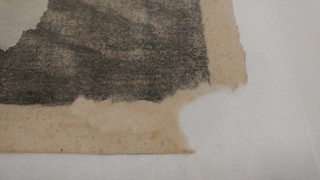
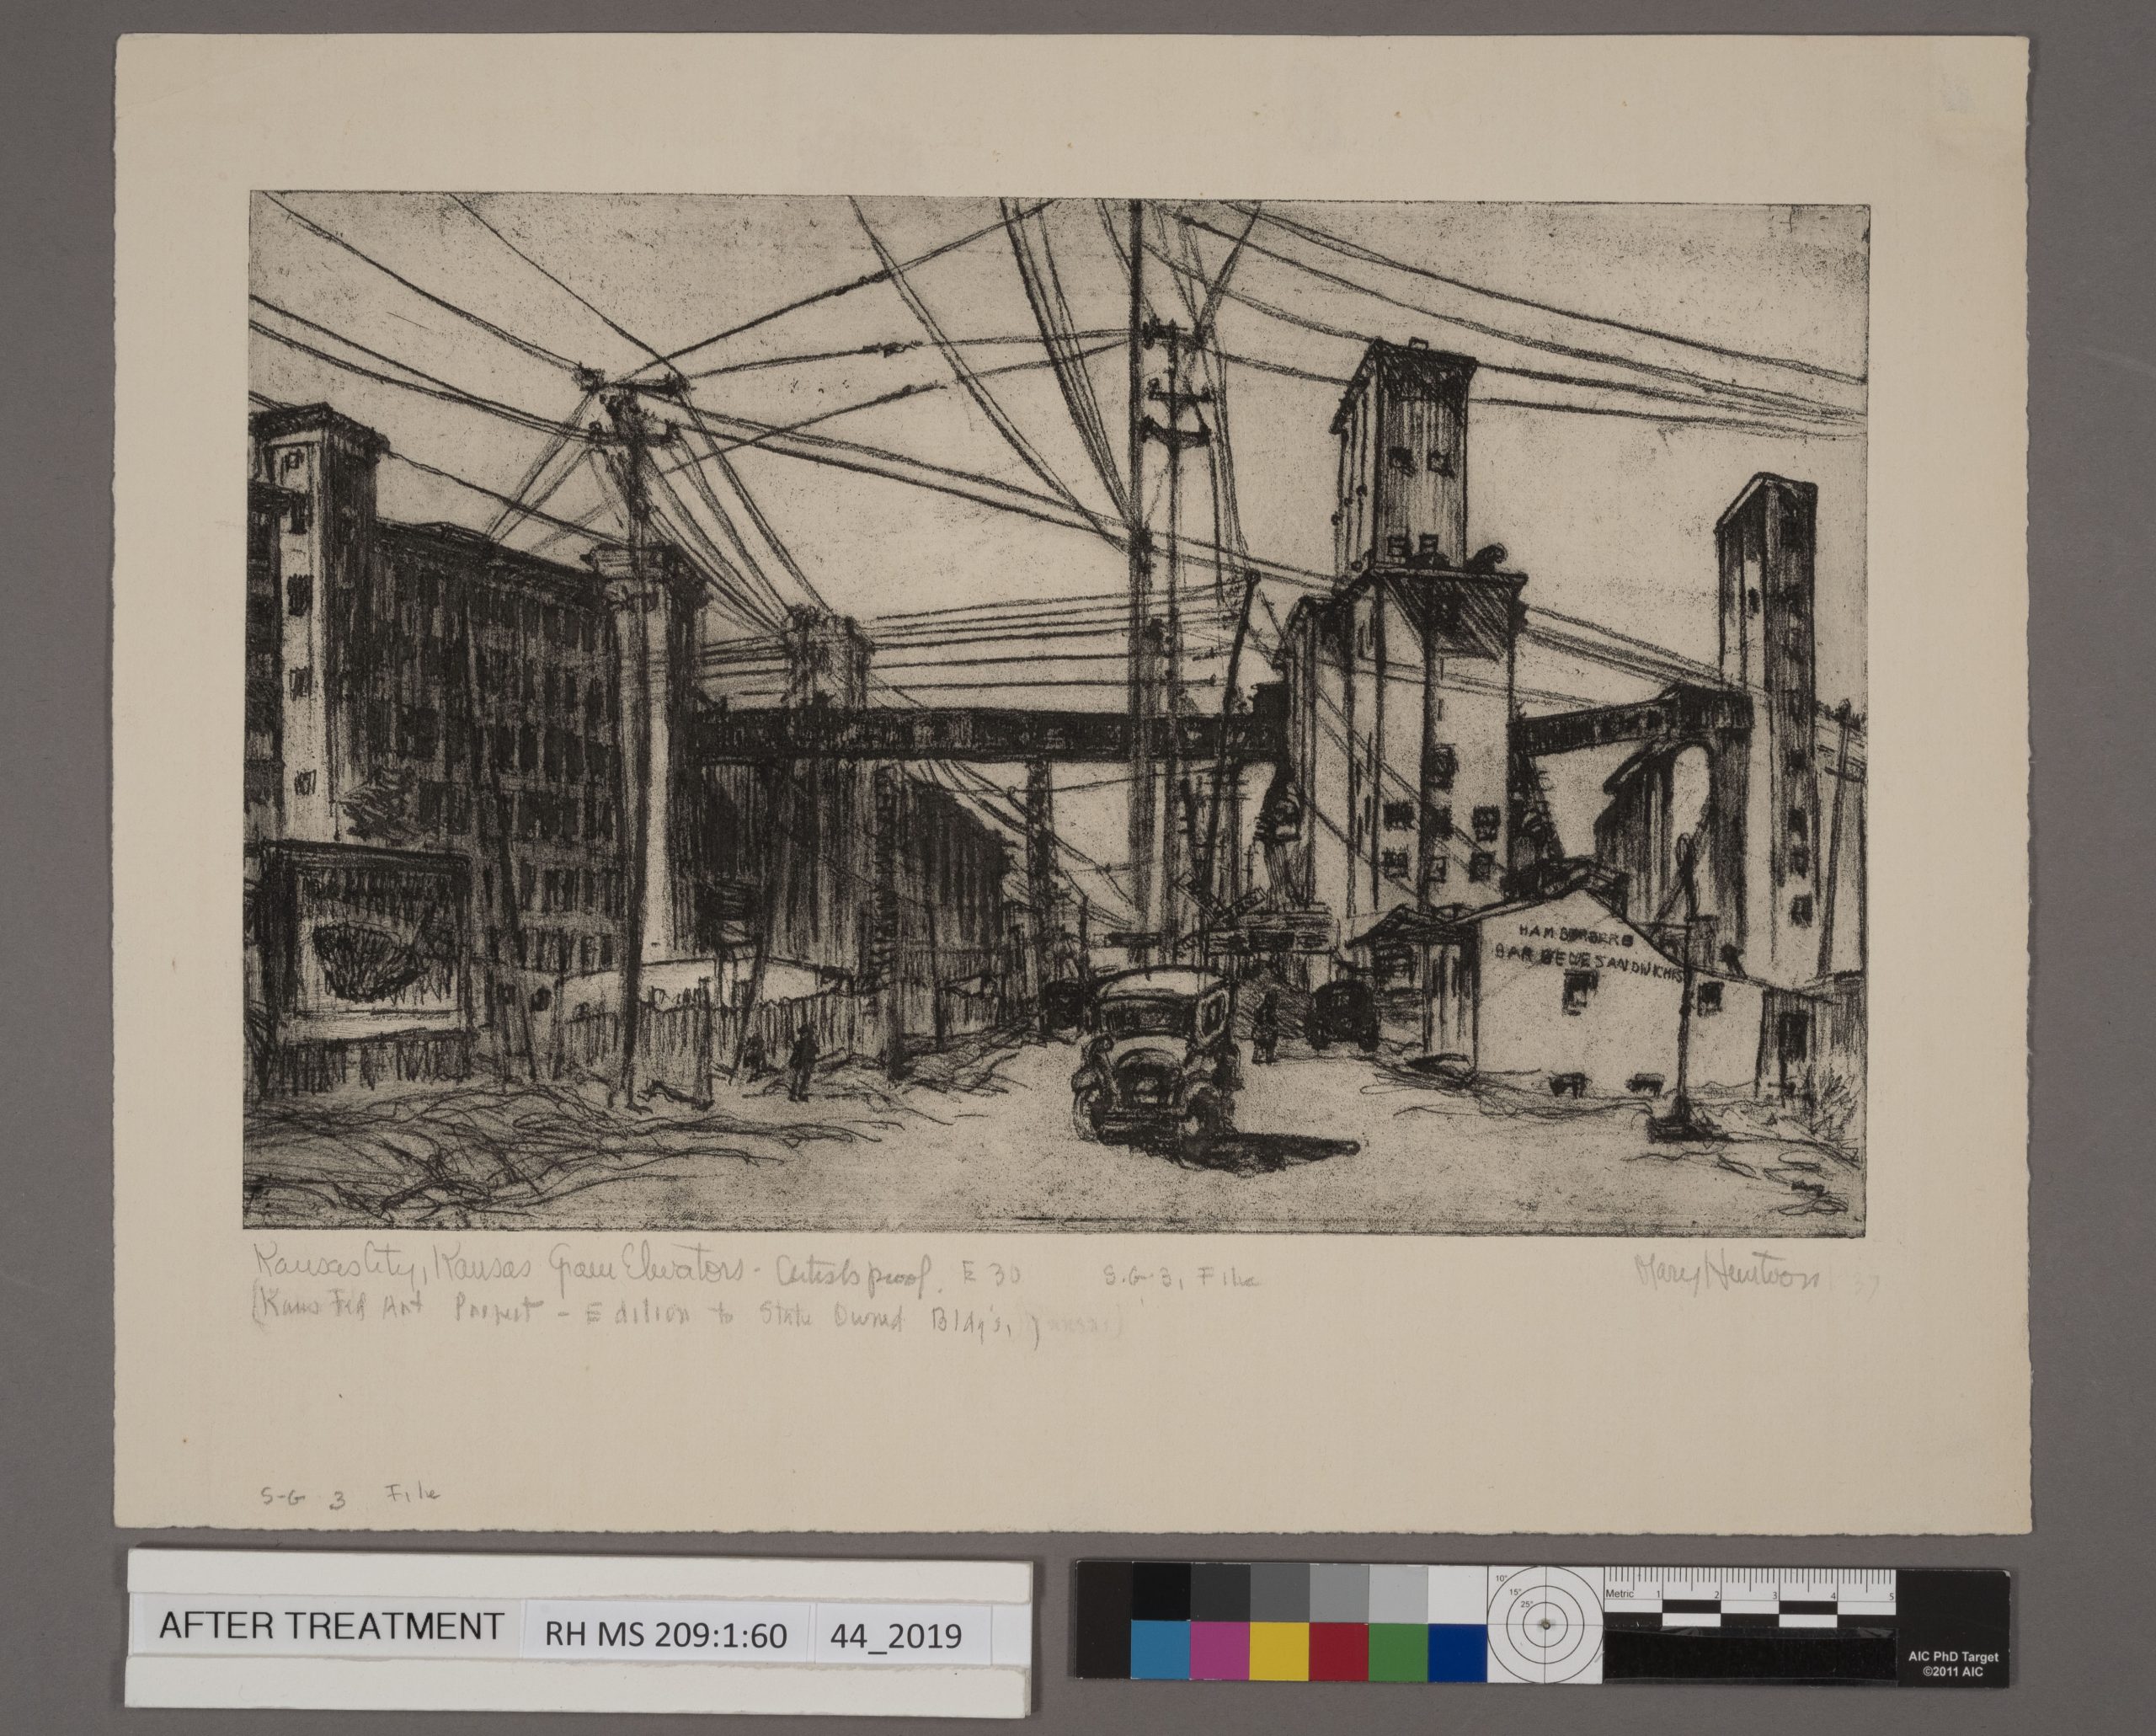
Once all the fills were completed, I dried the print between cotton blotters under moderate weight. After the print was fully dry, I assessed the pulp fill. Since the loss was in an area that would be used to attach it for display and/or handling, I decided to reinforce it with a very thin piece of Japanese paper, called tengucho. This would add extra strength to the area, but not change its visual effect. Finally, the edges of the pulp fill were toned slightly with graphite pencil and colored pencils to match the color of the rest of the sheet. Now that the treatment is finished, the pulp fills help to complete the print and bring the viewer’s eye back to the image area and away from the damage. 

The Mary Huntoon lithograph Zapalote, seen after treatment in normal light.
Image 6: The Mary Huntoon lithograph Zapolote, seen after treatment in normal light. Mary Huntoon Papers, RH MS 209:1:60. Click image to enlarge.
The Mary Huntoon lithograph Zapalote, seen after treatment in raking light.
Image 7: The Mary Huntoon lithograph Zapolote, seen after treatment in raking light. Mary Huntoon Papers, RH MS 209:1:60. Click image to enlarge.

Zapolote will be on view this fall 2021 at the Kenneth Spencer Research Library for the exhibit, Mary Huntoon: Artist and Art Therapist, and will feature several more examples of conservation treatments in this collection. We look forward to seeing you there!

Jacinta Johnson
Associate Conservator, Mellon Initiative

Treatment of Mary Huntoon’s Kansas City, Kansas Grain Elevators, an Etching: Part 2

May 19th, 2020

In the first installment of this two part blog series, the Kansas artist, Mary Huntoon, was introduced. We shared how her print, Kansas City, Kansas Grain Elevators, was prepared for an overall washing treatment in order to reduce several dark brown stains along the top edge that interrupted the image area and created bulging in the surface.

Before any washing treatments are performed on works on paper, all media are tested with the proposed washing solutions to ensure their stability. The surface is also checked for any areas where the print may have been previously restored, or even re-touched by the artist with another material that might be water-soluble. I carefully examined the print under magnification during testing in order to make sure the ink and paper were safe for washing. Everything checked out, so I was ready to start the washing step.

Kansas City, Kansas Grain Elevators, prior to treatment. Call Number: RH MS 209. Click image to enlarge.

Prior to washing, the print was gently surface-cleaned and the brown paper attachments were removed. You can read more about these steps in the first blog post about this treatment.

Before a work on paper is placed into a bath, the entire object must slowly undergo a humidification step. This helps to relax the paper and the media and prevents aggressive swelling. Then the object is gently sprayed with deionized water using a fine mist attachment in order to fully saturate it. This step-wise procedure ensures a gentle transition for the object into the bath.    

The print was washed in successive baths of pH-adjusted deionized water and air-dried. I examined the print once again to assess the progress of the washing step. The stains had noticeably lessened, but they were still quite visible, and I decided to test another stain reduction technique.

Using a small brush, I gently introduced very small applications of a dilute reducing bleach to the stained areas. This reduced the stain to an almost undetectable level. Then the bleach was fully rinsed with additional baths of pH-adjusted deionized water. I used an ultraviolet lamp to check to see that all the bleach, which fluoresces under ultraviolet radiation, was rinsed away.

The etching Kansas City, Kansas Grain Elevators, by Mary Huntoon, in normal light, after treatment.
Kansas City, Kansas Grain Elevators, in normal light, after treatment. Call Number: RH MS 209. Click image to enlarge.

After the stain reduction and overall washing was complete, it was time to address a few structural concerns. Weak creases in the upper corners made the print vulnerable to breakage and tearing, so I reinforced them using Japanese paper applied with wheat starch paste we make in our conservation lab. Instead of cutting the Japanese paper, it is wetted and torn. This torn edge makes use of the long kozo fibers in the paper and creates a strong mend that integrates well into the paper. After all the mends and reinforcements were complete, the print was humidified a second time and flattened between thick felts. Pressing between felts helped to remove planar distortions along the edges, while also maintaining the plate mark of the etching.

Now that the treatment is complete, the print is ready to be returned to the collection where it can be safely examined by visitors to the Kenneth Spencer Research Library.  

The Kenneth Spencer Research Library is home to the collection of papers and original artwork by Kansas artist and art therapist, Mary Huntoon (1896 – 1970). As part of a collaborative initiative between KU Libraries and the Spencer Museum of Art, funded by the Andrew W. Mellon Foundation, many of the prints, drawings, and watercolors by Huntoon will be treated.

Creases in the upper corners of the etching Kansas City, Kansas Grain Elevators, by Mary Huntoon, being reinforced with Japanese paper attached with wheat starch paste.
Creases in the upper corners were reinforced with Japanese paper attached with wheat starch paste. Call Number: RH MS 209. Click image to enlarge.
The etching Kansas City, Kansas Grain Elevators, by Mary Huntoon, in raking light, prior to treatment (at left), and after treatment (at right).
Kansas City, Kansas Grain Elevators, in raking light, prior to treatment (at left), and after treatment (at right). Call number: RH MS 209. Click image to enlarge.

Jacinta Johnson, Associate Conservator, Mellon Initiative

Treatment of Mary Huntoon’s “Kansas City, Kansas Grain Elevators,” an Etching: Part 1

December 3rd, 2019

The Kenneth Spencer Research Library is home to the collection of papers and original artwork by Kansas artist and art therapist, Mary Huntoon (1896-1970). As part of a collaborative initiative between KU Libraries and the Spencer Museum of Art, funded by the Andrew W. Mellon Foundation, many of the prints, drawings, and watercolors by Huntoon are being treated over the next two years.

Huntoon was born in Topeka, Kansas. After graduating from Washburn University in 1920, she studied at the Art Students League in New York City for six years under Joseph Pennell and Robert Henri, and was a good friend and colleague of William Stanley Hayter, founder of Atelier 17. She later became director of the Kansas Federal Art Project and made significant contributions to the early development of art therapy.

Artist Mary Huntoon draws with a stylus on a copper printing plate.
Artist Mary Huntoon draws with a stylus on a copper printing plate. Mary Huntoon Papers. Call Number: RH MS 209. Click image to enlarge.
Artist Mary Huntoon stands before an easel, at work on a painting.
Artist Mary Huntoon stands before an easel, at work on a painting. Mary Huntoon Papers. Call Number: RH MS 209. Click image to enlarge.

Kansas City, Kansas Grain Elevators, is an artist’s proof print (a print made prior to the final edition), an etching in black printing ink on cream, laid, machine-made paper. The primary condition issue involves two large brown stains along the top edge that interrupt the image area and cause distortions in the sheet. An overall washing treatment was proposed in order to reduce the appearance of the stains.

The Mary Huntoon print, "Kansas City, Kansas Grain Elevators," prior to treatment.
The Mary Huntoon print, “Kansas City, Kansas Grain Elevators,” prior to treatment. Mary Huntoon Papers. Call Number: RH MS 209. Click image to enlarge.
The Mary Huntoon print, "Kansas City, Kansas Grain Elevators," in raking light, prior to treatment.
The Mary Huntoon print, “Kansas City, Kansas Grain Elevators,” in raking light, prior to treatment. Mary Huntoon Papers. Call Number: RH MS 209. Click image to enlarge.

In preparation for the treatment, the printing inks were tested to ensure they would be stable during the wet treatment. The outer margins and back of the print were selectively surface-cleaned with a soft sponge, avoiding all printed areas, as well as the graphite pencil inscription. Surface-cleaning ensures that loose and embedded dirt and grime are not driven deeper into the paper support during the wet treatment.

A soft sponge is used to remove embedded surface dirt and grime from the Mary Huntoon print, "Kansas City, Kansas Grain Elevators."
A soft sponge is used to remove embedded surface dirt and grime from the Mary Huntoon print, “Kansas City, Kansas Grain Elevators.” Mary Huntoon Papers. Call Number: RH MS 209. Click image to enlarge.

Brown paper tape attachments on the top edge of the front and back of the print were removed with a methylcellulose poultice. The attachments had been partially removed at some point, and the top layer of the paper was slightly skinned. The poultice delivers moisture in a controlled way, softening the adhesive, and allowing safe removal of the attachment.

A methylcellulose poultice is applied to deliver controlled moisture to soften adhesive and brown paper attachments on the Mary Huntoon print, "Kansas City, Kansas Grain Elevators."
At left, brown paper attachments had been partially detached at some point, skinning some of the paper fibers. At center, a methylcellulose poultice was applied to the attachment to deliver controlled moisture to the area. At right, the poultice softened the adhesive and paper. It was gently removed at an acute angle with tweezers and dried flat. Mary Huntoon Papers. Call Number: RH MS 209. Click image to enlarge.

The print is now ready to be washed. Stay tuned for Part 2 to learn how the stains were reduced.

Jacinta Johnson
Associate Conservator, Mellon Initiative