Working from home: Making a girdle book model
September 14th, 2020During the summer of quarantine, I constructed quite a few bookbinding models to try out structures I was reading about or hadn’t made before. I decided to finally pursue my dream of constructing a medieval girdle book. This style of bookbinding is most easily identified by an extension of the covering material, which often ends in a knot. The extension and knot allow for the book to be attached to a belt and carried on the person.
Only twenty-three girdle books are known to exist today, but if we judge by their presence in medieval art, they were a popular commodity at the time. Manuscript books were luxury items, so their representation in art signifies wealth and prestige. Because these books were meant to be carried on the body, they are usually quite small.
Girdle books have a lot of components, many of which were difficult to acquire early in the pandemic. So I reached out to bookbinder and teacher Karen Hanmer to see if she would sell me the raw materials. She enthusiastically agreed, sending me every last component to make the book, as well as an in-depth instruction manual. Because I have bound books for many years, the manual was sufficient for completing the project. However, for someone new to bookbinding, I recommend taking her class in person.
The first step was to construct the text block. I folded papers into groups of four sheets each (called a section or quire). A piece of parchment, a type of animal skin, was hooked as an endsheet around the outer sheets of the first and last section. The sixteen sections were pressed under a board and heavy weight. After a few days, I sewed the sections on sets of linen cords, using a device called a sewing frame that holds the cords taut. The sewing structure used on this book is called “packed” sewing, which requires sewing around the double cords and looping around a few times in between each quire to add strength along the spine.
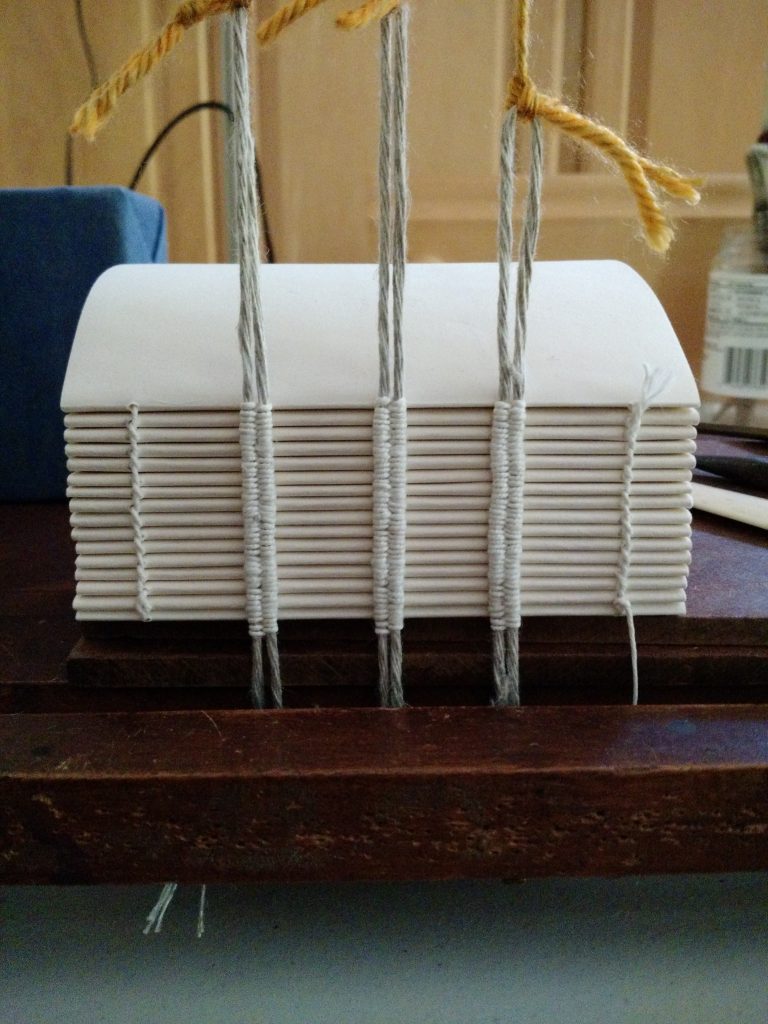
The sewing creates a natural round at the spine. In order to hold that shape, I placed the textblock in a press, further shaped the spine with my fingers, then attached parchment strips between the middle sewing supports with wheat starch paste. The parchment extended beyond the edge of the spine, to be attached to the inside of the boards.
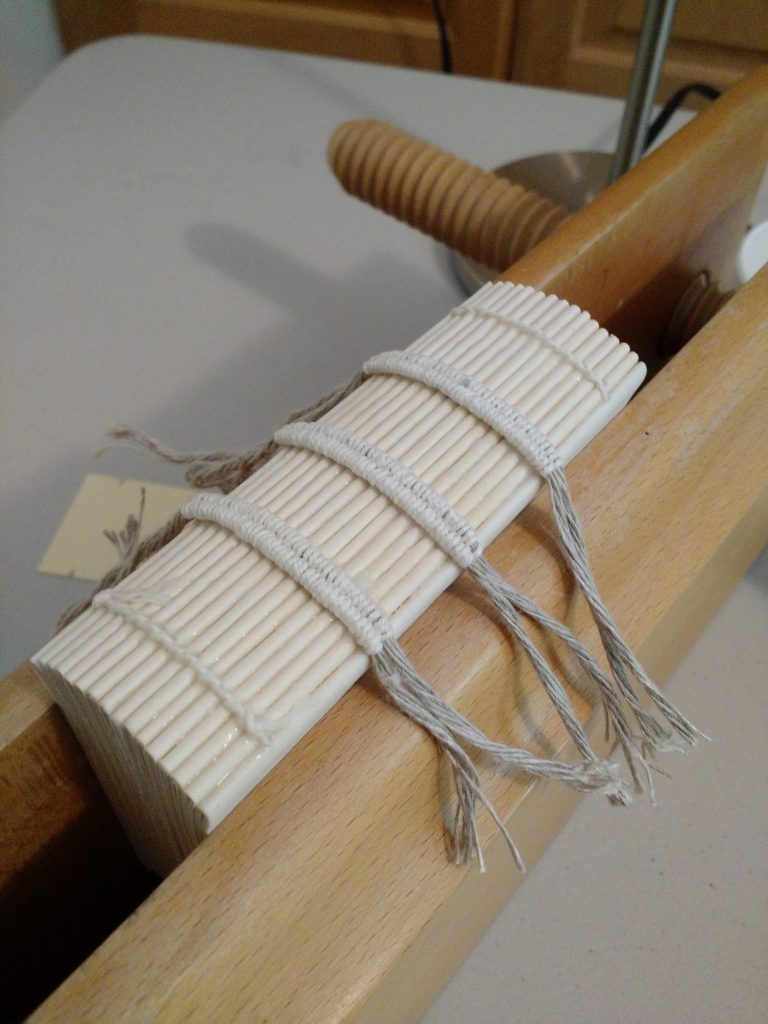
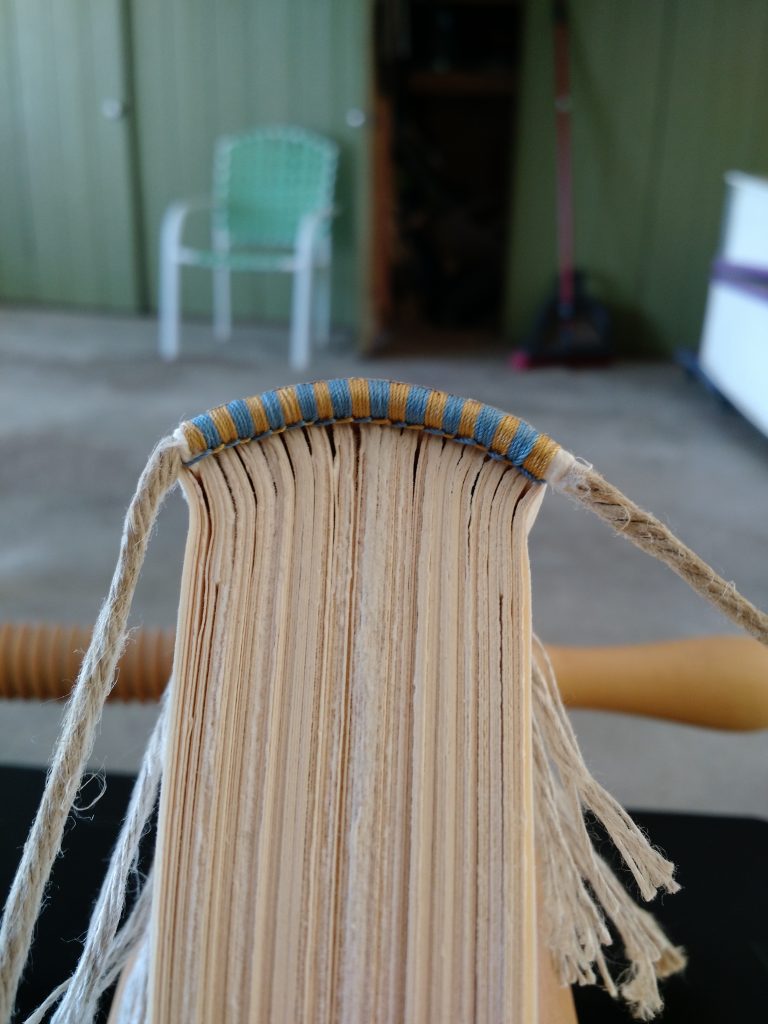
The next step was to sew endbands at the top and bottom (head and tail) of the book. During the medieval era, the endband was sewn on a core (in this case, linen cord) that extended beyond the spine and was laced through the boards to add stability to the book. I chose to sew a primary endband using linen thread wrapped around a linen cord core. This style of endband has the bead (or thread pass-over) on the back. Then I sewed a secondary, decorative endband over it using blue and yellow silk thread, with a bead on the front.
The boards on medieval books were almost always made of wood. I’m not an experienced woodworker, so the wood shaping steps took a lot of time. I shaped the wood at the spine edge to accommodate the round of the textblock spine, on both the inside and outside of the wood piece. The other edges were beveled. Next I marked and drilled holes for the sewing and endband cords to lace through the wood, and chiseled channels between the two sets of holes. A channel was also cut and chiseled to accommodate a strap at the fore-edge
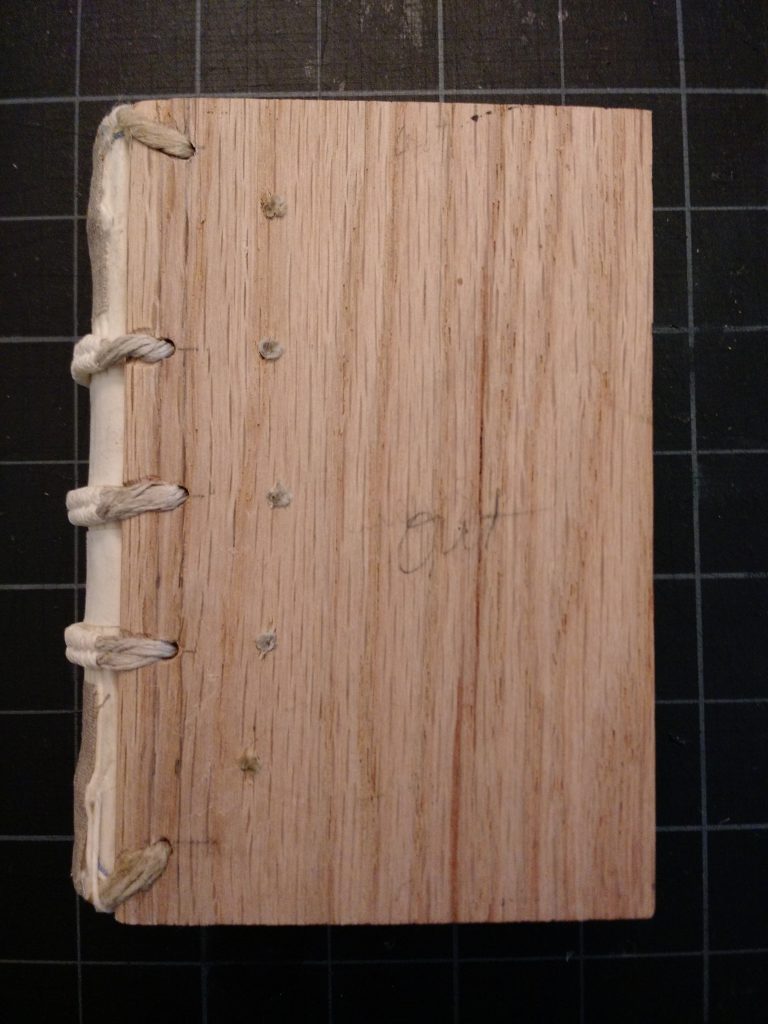
Once the cords were laced through and wedged in place, the book was ready to be covered. Karen offered me a few options, and I chose grey pigskin. I have repaired many books covered in pigskin but hadn’t bound any new ones in the material. As expected, pigskin was tougher and less pliable than calf or goatskin. Once dry, the vellum spine lining extensions would typically be adhered to the inside of the wooden boards. I decided to leave them unattached at the front and adhered at the back, since I will use this model as a teaching tool and I wanted to show steps in the bookbinding process.
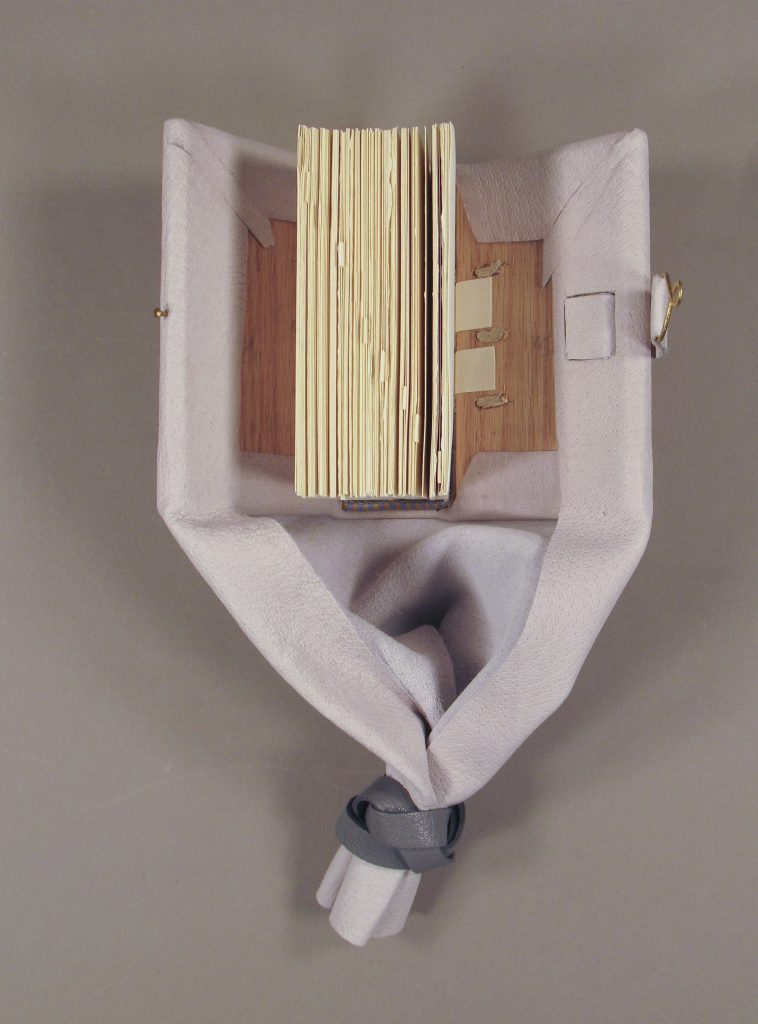
To close the book, Karen suggested making a simple clasp from brass rod, with a brass escutcheon pin on the center edge of the top board. The strap is a laminate of pigskin and airplane linen. I laced the strap through the back board and adhered it on the inside in the channel cut into the wood. Medieval books were often written on animal skin, which has a spring to it, so clasps were necessary to keep the book closed.
Karen’s kit was so complete that she even included some finishing embellishments. A contrasting gray leather was used to create the traditional Turk’s head knot that is often found at the end of the leather extension. I decided to create a simple design on the outer covers with a bone folder, and added upholstery tacks as bosses (traditionally used to protect the leather when the book was placed on a surface). Karen thoughtfully even included tiny scraps of parchment to create markers on the edges of the book’s pages.
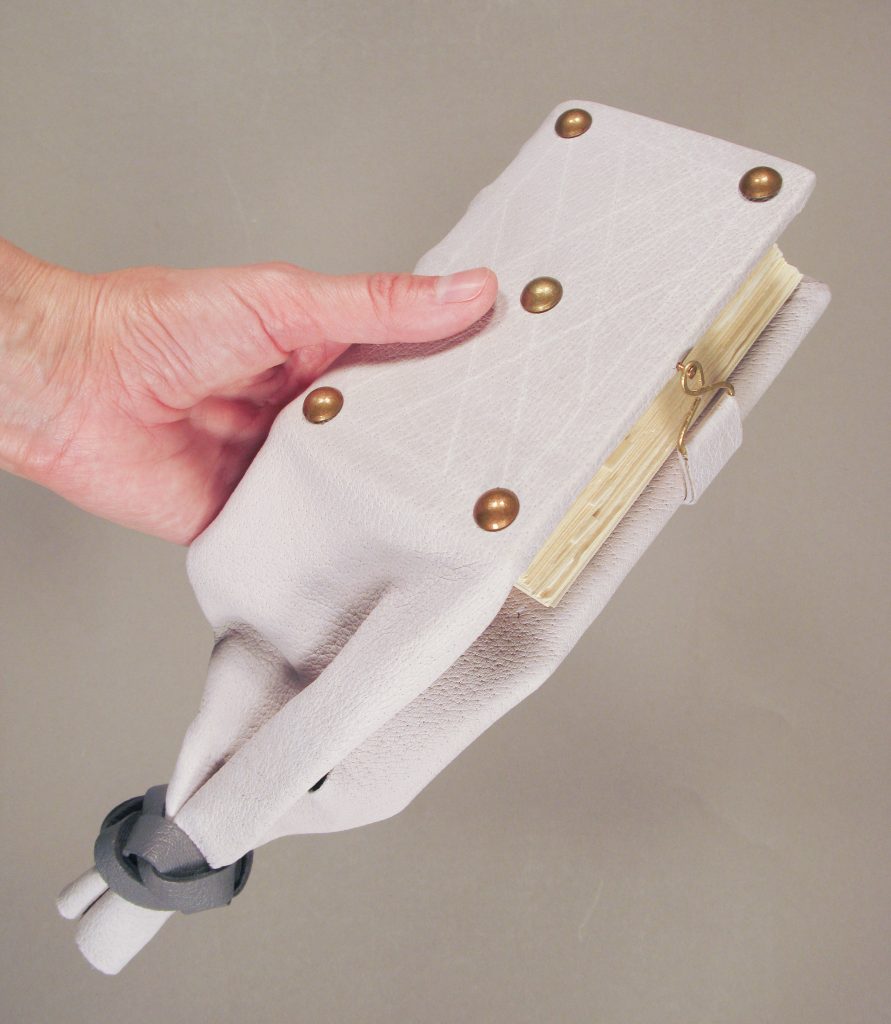
While this project took many evenings and weekends over a few months, I am very pleased with the results. I will add this model to our bookbinding model collection in Conservation Services, to teach bookbinding history to classes and public visitors.
Whitney Baker
Head, Conservation Services
